
Table of Contents
No-Oven Stovetop Bread: A Simple Guide
This guide teaches you how to make bread on your stovetop without an oven. We’ll cover the ingredients, the steps, and tips for success. We’ll explain why this method works and show you how to avoid common mistakes.
Essential Ingredients: Simple and Effective
Basic Ingredients
You need just a few things to make stovetop bread. Flour provides structure. Yeast helps the bread rise. Water activates the yeast and creates dough. Salt adds flavor.
Why Each Ingredient Matters
Flour gives the bread its shape. Yeast makes it fluffy. Water mixes everything together. Salt improves the taste. Without these, your bread won’t work!
Optional Extras
Want to add some fun? Try herbs like rosemary or oregano. Cheese adds a tasty kick. Experiment and find your favorite additions!
Ingredient Substitutions
Sometimes you need to change things up. If you don’t have fresh yeast, some recipes work with active dry yeast. You can usually substitute bread flour with all-purpose flour, but the texture may change slightly.
Mixing the Dough: Achieving the Right Consistency
Kneading Techniques for Stovetop Bread
Mixing the dough correctly is important for good bread. You’ll need to knead the dough. Kneading pushes and folds the dough to develop gluten. Gluten is a protein that gives bread its structure. Knead until the dough is smooth and elastic. This usually takes about 8-10 minutes.
Recognizing When Your Dough is Ready
How do you know when the dough is ready? It should be smooth and slightly sticky, but not too wet. It should also spring back when you poke it gently. If it’s too sticky, add a little more flour. If it’s too dry, add a little water.
Flour Types and Their Effects
Different flours make different breads. Bread flour has more protein, making chewier bread. All-purpose flour is a good choice for most recipes. The type of flour affects the final texture and taste of your bread.
Ingredient Table
| Ingredients | Quantity | Note |
|---|---|---|
| Flour | 2 cups | Bread flour or all-purpose flour |
| Yeast | 1 teaspoon | Active dry yeast |
| Water | 1 cup (warm) | Adjust as needed |
| Salt | 1/2 teaspoon | Enhances flavor |
First Rise: Creating a Flavorful Base
The First Rise is Key
The first rise is super important. It’s when the yeast works its magic, making your dough bigger and fluffier. A warm place helps the yeast grow faster. Think of it like this: yeast likes to be cozy!
Checking for Doubled Size
How do you know when your dough has risen enough? It should be about double its original size. This means it’s puffy and looks much bigger than when you first mixed it. This usually takes about an hour, but it could take longer or shorter depending on how warm it is.
Warmth is Important
A warm spot is key for a good rise. You can use a warm room or even a slightly warm oven (turned off!). Don’t use a place that’s too hot, because that will kill the yeast. A cozy temperature is what you’re aiming for.
Shaping the Bread: Preparing for Cooking
Forming a Loaf
To make a loaf, gently push the dough into a rectangular shape. Roll it up tightly, like a jelly roll. Pinch the seam to seal it. Place the loaf in your cooking pan.
Making Rolls
For rolls, divide the dough into equal-sized pieces. Roll each piece into a ball. Place the rolls in your cooking pan, leaving some space between them for rising.
Shaping Tips for Stovetop Bread
The shape affects how your bread cooks. A loaf cooks more evenly, while rolls might brown faster on the bottom. Make sure there’s enough space in your pan for the dough to rise. A little extra room prevents sticking and ensures even baking. Try different shapes to find what you like best!
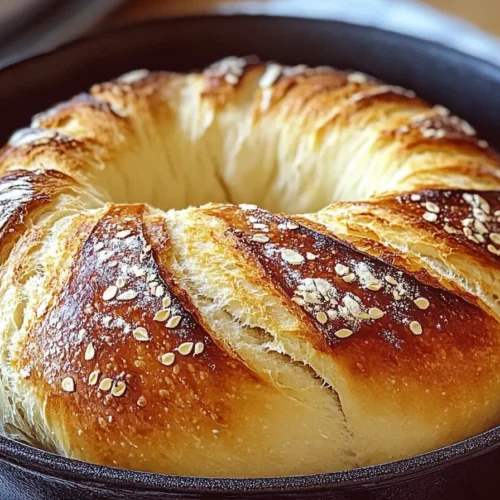
Stovetop Cooking: Achieving a Golden Crust
Cooking Your Bread
Put your shaped bread into a heavy pan with a lid. Use medium heat. Cooking time depends on your stove and the size of your bread. It usually takes 15-20 minutes.
Using a Covered Pan
The lid traps steam, which helps your bread rise and get soft inside while the bottom browns nicely. Don’t lift the lid too often, or the steam will escape, making your bread dry.
Monitoring the Cooking Process
Watch your bread carefully. You’ll see it start to brown on the bottom. If one side browns faster, rotate the pan to cook evenly. If the top isn’t browning enough, you might need to increase the heat a little.
Heat Control is Key
Medium heat is usually best. Too high, and the outside burns before the inside is cooked. Too low, and your bread will take forever to cook. Adjust the heat as needed to get a beautiful golden brown crust.
Second Rise (Optional): Enhancing Texture
Why a Second Rise?
After your first rise, and before cooking, you can let your shaped bread rise again. This isn’t always necessary, but it can give your bread a softer, fluffier inside. Think of it as a little extra time for the yeast to work its magic.
How Long Should it Rise?
This second rise is shorter than the first. About 20-30 minutes is usually enough. You’ll see the bread puff up a bit more. It’s ready when it looks a little taller and softer.
The Best Place for a Second Rise
A warm, draft-free spot is best. You can leave it on the counter, or in a slightly warm oven (make sure it’s turned off!). Just like the first rise, you want a cozy, not hot, environment for the yeast.
Cooling and Serving: Enjoying Your Creation
Cooling Your Stovetop Bread
Let your bread cool in the pan for about 10 minutes after cooking. This lets the inside finish cooking and helps prevent it from getting soggy. Then, carefully remove it from the pan and place it on a wire rack to cool completely. This allows air to circulate and prevents moisture from getting trapped.
Serving Suggestions
Your delicious stovetop bread is great on its own! You can also serve it with:
- Soup
- Salads
- Stews
- Dips
Try it with butter, jam, or honey. It also makes amazing toast! Get creative and experiment with different toppings and pairings. For a comforting meal, enjoy it alongside a warm bowl of Slow Cooker Pasta e Fagioli a hearty and flavorful dish that pairs perfectly with homemade bread.
Frequently Asked Questions
What kind of pan should I use?
A heavy-bottomed pan works best for even heat distribution. This prevents burning and ensures your bread cooks evenly. Avoid thin pans, as they can heat unevenly.
How do I know if my yeast is still good?
Active dry yeast should be stored in a cool, dry place. To check if it’s still alive, mix 1 teaspoon of yeast with 1/4 cup of warm water and a pinch of sugar. Let it sit for 5-10 minutes. If it gets foamy, the yeast is good!
What if my bread is too sticky?
If your dough is too sticky, add a little more flour, a tablespoon at a time, until it reaches the right consistency. It should be slightly sticky but not overly wet.
Can I use different types of flour?
Yes, but the type of flour affects the texture. Bread flour produces a chewier loaf, while all-purpose flour is a good general option. Experiment to find your preference.
Enjoy Your Homemade Stovetop Bread
Your Delicious Bread Awaits
This guide showed you how to bake tasty bread on your stove. You learned about the ingredients, the steps, and helpful tips. Remember, even heat and the right amount of moisture are important for good results. Now it’s your turn to get baking!
Tips for Success
Practice makes perfect! Don’t worry if your first loaf isn’t perfect. Keep trying, and you’ll get better each time. Experiment with different additions, like herbs or cheese. Have fun and enjoy the process of making your own bread.
Next Steps: Baking Adventures
Try different recipes and variations. Make rolls, loaves, or even try adding different flavors. Share your delicious creations with friends and family. Stovetop bread is a fun and rewarding way to bake. This guide will help you bake delicious no-oven stovetop bread. Remember to follow the instructions carefully, and enjoy the process!
No-Oven Stovetop Bread
Equipment
- Heavy-bottomed pan
- Lid
Ingredients
- 2 cups Flour Bread flour or all-purpose flour
- 1 teaspoon Yeast Active dry yeast
- 1 cup Water Warm
- 1/2 teaspoon Salt Enhances flavor
Instructions
- Mix the dough: Combine flour, yeast, water, and salt. Knead for 8-10 minutes until smooth and elastic.
- First rise: Place dough in a warm place for about an hour, or until doubled in size.
- Shape the bread: Form the dough into a loaf or rolls.
- Stovetop cooking: Place the shaped bread in a heavy pan with a lid. Cook over medium heat for 15-20 minutes, or until golden brown.
- Cool: Let the bread cool in the pan for about 10 minutes before removing and cooling completely on a wire rack.